To make your event page stand out on Kago Events, you can add images, banners, and custom descriptions. Follow these step-by-step instructions to customize your event page:
- Go to the Event Setup Section
- In your Kago Events dashboard, select Event Setup from the menu on the left. This section allows you to customize your event’s visuals and descriptions.

Add an Event Banner
- Within the Event Setup section, look for the option to add a banner image.
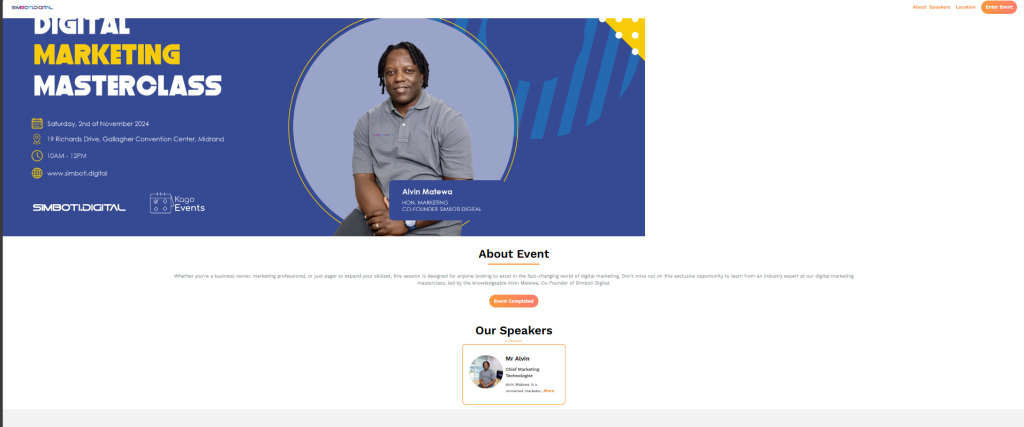
- Click Upload Banner (or similar option) and choose an image file from your device. Make sure the image is high-resolution and relevant to your event theme.
- Adjust the banner position if the platform provides that option, then save your changes.
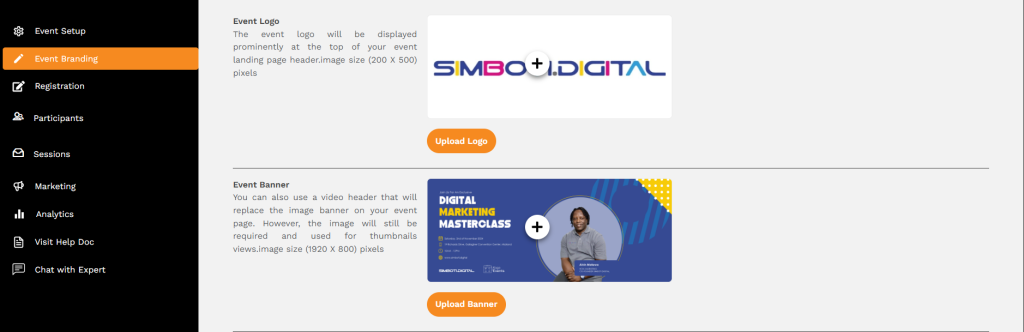
Add an Event Logo
- In the same Event Setup section, locate the Event Logo option.
- Click Upload Logo and select a logo file from your device.
- Use a transparent PNG, if possible, for a professional look. This logo will often appear next to your event name, so choose something visually impactful.
Add Images to the Event Description
- Go to the Event Description area (sometimes found in Event Branding or Event Details).
- Use the formatting toolbar to insert images within the description, if the option is available.
- Select Insert Image and upload your image files, arranging them to visually support the event’s details. You can use images of guest speakers, sponsors, or event activities.
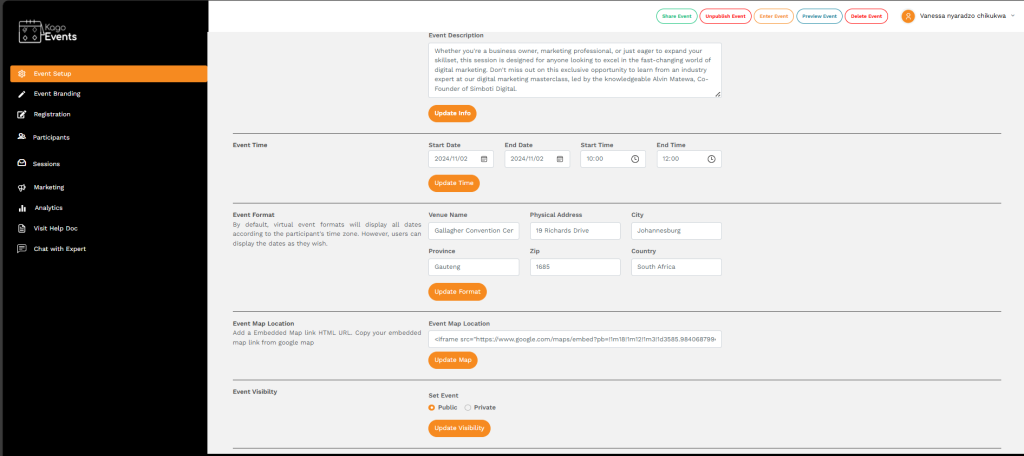
Customize the Event Description Text
- Write a compelling event description that engages attendees. In the Event Description section, add a summary of the event, its goals, and what attendees can expect.
- Use formatting tools to make key information stand out, such as bolding, bullet points, and headings.
- Consider including links to highlight speakers, sponsors, or additional resources.
Add Additional Banners or Backgrounds (if available)
- Some event pages allow you to add background images or additional banners.
- Go to Event Branding or a similar section to upload backgrounds or additional visual elements to enhance the page’s aesthetic.
Preview Your Event Page
- Before finalizing, use the Preview option to see how your event page will look to attendees.
- Check that all images, banners, and descriptions are displaying correctly and adjust them if necessary.
Save and Publish
- After making all adjustments, save your changes.
- When you’re ready for attendees to see the page, publish it to make it live.
By following these steps, you can create an engaging and visually appealing event page on Kago Events that will capture attendees’ interest.